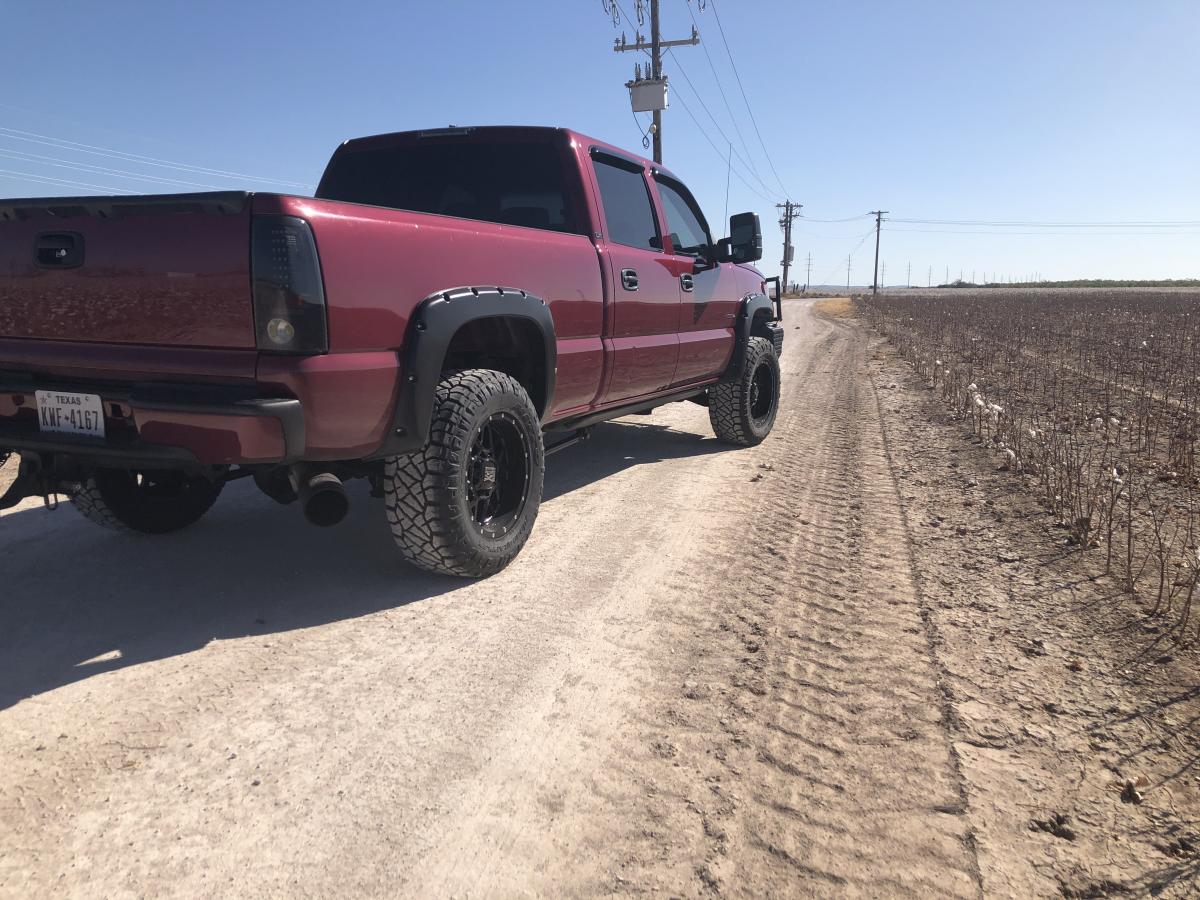
Our next project was to install new Bushwacker rivet-style fender flares on our 2007 LBZ Duramax.
We decided to run the Bushwacker 40918-02 Pocket Style Smooth Finish Fender Flares in black for some added protection from the wider wheels we're running.
Out of the box, everything was included in the list below.
- Torx bit T-45
- Stainless Rivet screws/lock nuts/washers
- Plastic pop style rivets (for mounting the flares)
- Rubber Duro Edge Trim
Now Recommended tools were:
- Screwdriver
- Bit Driver
- Utility knife
- Drill (using a 5/16th" bit) **** But we have found this waqs too large for the plastic 1/4" pop rivets, so we used a 15/64" bit and it worked a lot better
- 1/2" wrench
Pre-install steps:
Step 2: Remove factory fender trim and mud flaps (when installed).
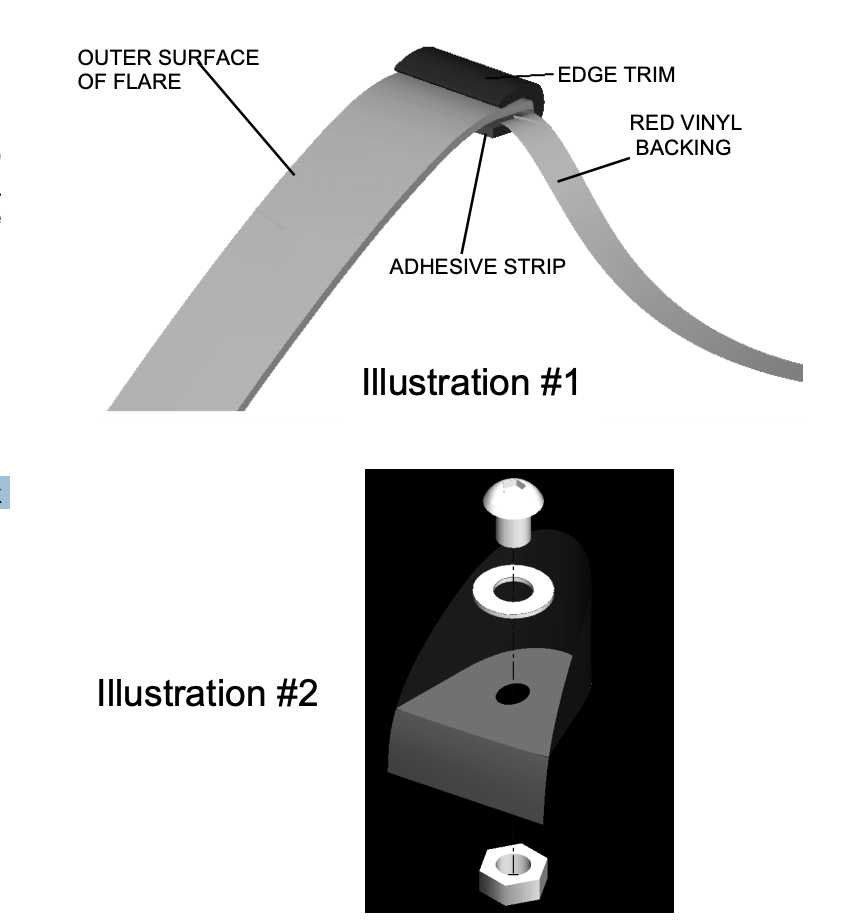
Step 3: Edge Trim Installation (See Figure #1) (A) Peel two to three inches of red vinyl backing away from the edge trim tape. Applying the adhesive side of the edge trim to the inner side of the flare, affix the edge trim to the top edge of the flare (the portion that comes in contact with the side of the vehicle).
(B) Press edge trim into place along the top edge of the flare in one-foot increments, pulling red vinyl backing free as you continue to work your way around the top edge of the flare.

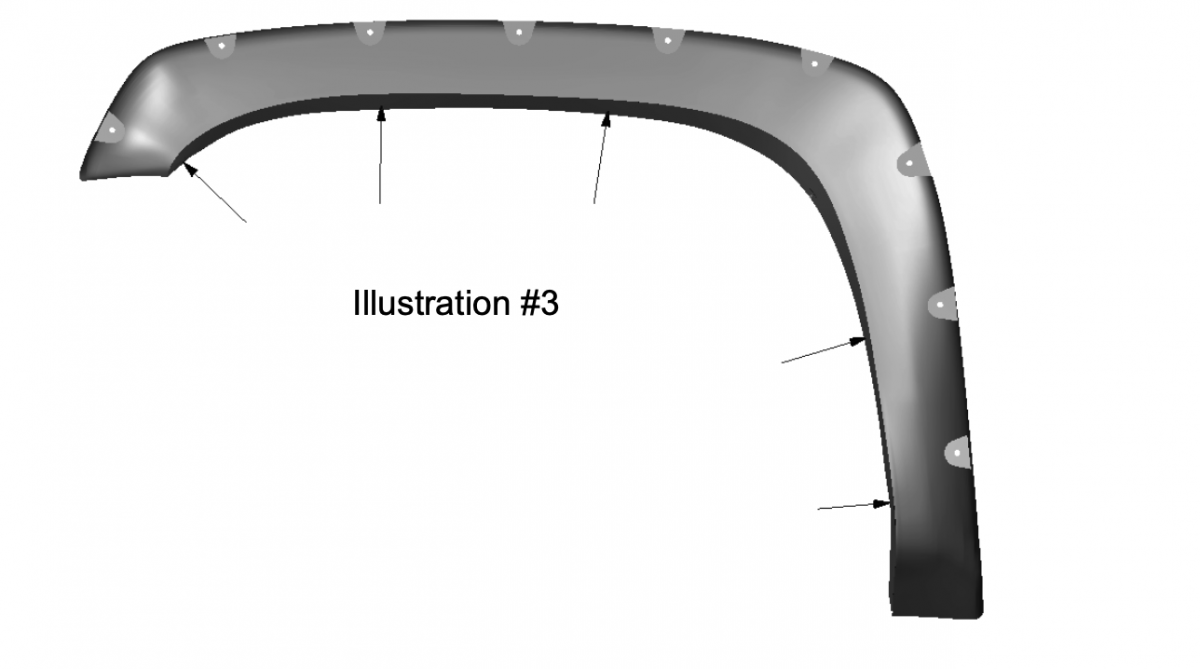
Step 4: Front Flare Installation (A) Insert stainless steel screw and washer into the front of flare, secure with nyloc nut, using a T45 Torx bit. (See illustration #2)
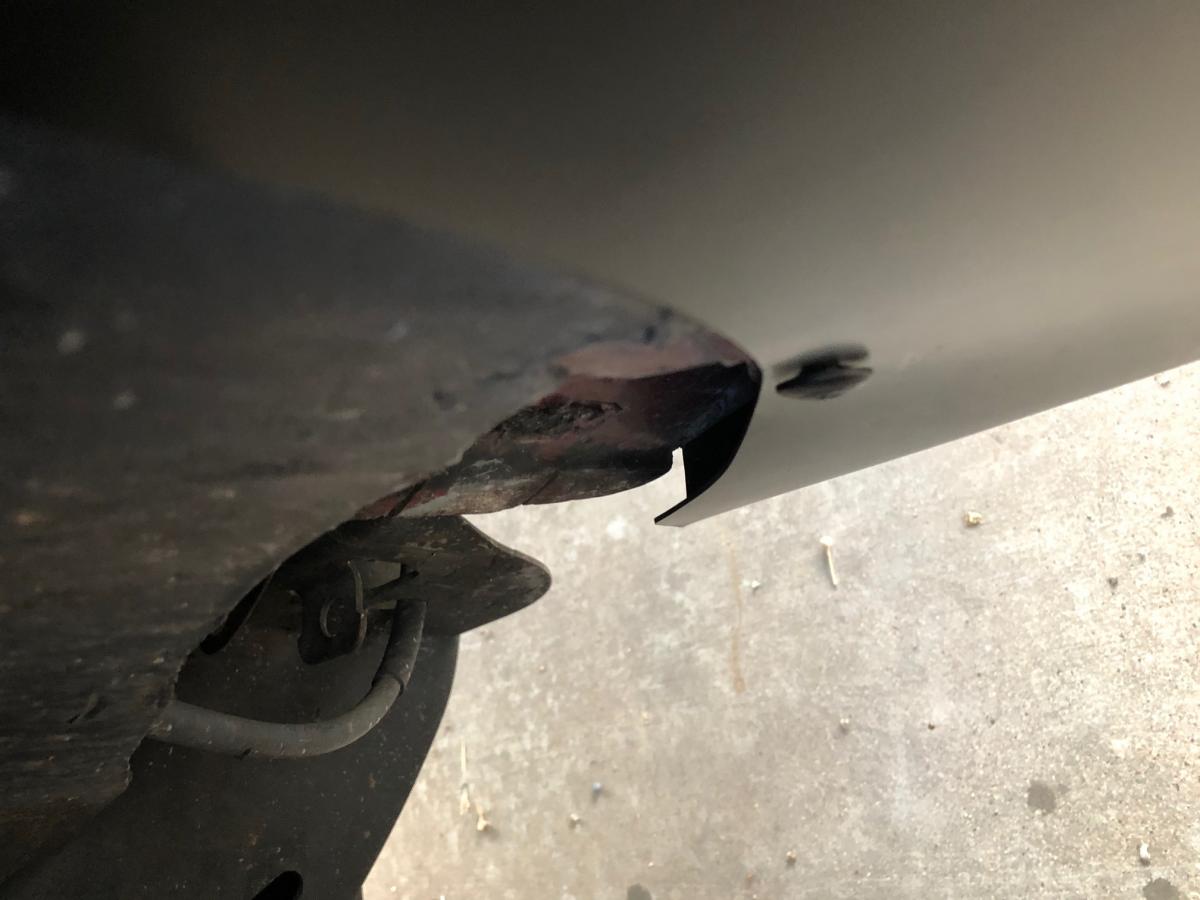
(B) Hold the front flare in place on the fender, secure with supplied Tuf-Lock fasteners through the holes drilled in the flare, into the holes in the fender body wheel well. (See arrows in illustration #3).

This part is pertaining to the installation onto the truck itself.
*If your truck had previous flares factory or non there will be holes already there under the wheel wells. We found while some of them matched up perfectly others did not, and we had to drill holes accordingly. PLEASE note vehicles will all differ, and the hole can be off from vehicle to vehicle.
* We do recommend getting some extra pop rivet screw style before starting as we broke several heads off due to them being plastic.
We'll go fender by fender to explain what we had to do.
-Front fender passenger side:
- After lining it up correctly (you'll see the indentions on the flare to fit the truck's indentions we started at the front and popped it in as that hole lined up. For the first top hole we had to drill this one as the holes wouldn't line up, then after we did that the rest lined up. I do recommend having 2 people do that, so you make sure the fitment is tight against the body of the truck. There was a little bit of a gap at the back bottom flare part, but it was tight in place, so we left it alone.
Rear Fender Passenger Side:
- This flare was easy, and every hole matched up with no issues. (just broke a few of the plastic screw heads off as they are very brittle)
- We got the front bottom rivet in, then went to the back bottom rivet, then holding up and pressing against the truck we popped the top 2 rivets into place creating a good tight fitment.
Reaf Fender Driver Side:
- This one we had to drill 2 holes in, the existing holes just didn't line up correctly.
- Following the same method we found it easier to start the back 2 rivets and then work our way to the front. We drilled the 1st hole in the top front position and then the middle back position. After we drilled and popped those in the front 2 went in with ease.
Front Fender Driver Side:
- This was the hardest of them all. *** Please Note this side gave us fits because the previous truck owner had done a norcal fender mod so to speak and beat back the metal fender panel to create room for a larger tire. When doing this, it causes the holes to be too far away from the flare, and the holes then will not line up.

- We bent that metal back a little bit to bring the hole closer to the flare and then the back 2 holes lined up.
- We drilled 2 holes into the one as well and both of them were in the top 2 positions. Remember to use a 15/64" bit as that's a better size hole to fit the 1/4" pop retainers.
- After drilling the hole, they then lined up, and then the front 2 existing holes matched up. Again with 2 people, it's easier to pull up and push the flare in for a tight fit on the truck.
*This job took a little longer than expected since we ran into some issues with the correct drill bit and had to go get some more retainers. From start to finish it was a 3-hour job, but with no issues and 2 people, I would put it at an hour install time.
We will post a follow-up video and review it after we've put some miles on them. Thanks!
#injectedmotorsports #bushwacker #duramax

*LIMITED LIFETIME WARRANTY AGAINST ANY MANUFACTURING DEFECTS


_810.png)